High Speed Thermal Imaging Cameras from FLIR Monitor Raw Steel Quality for the Automotive Industry

FLIR thermal imaging cameras detect steel defects with the highest accuracy.
In today’s industrialized world the demand for steel, particularly from the automotive industry, has become overwhelming. Although effective methods for the testing of raw steel materials exist, the call for more efficiency, more safety and higher quality never stops. In order to improve on the current methods for non-destructive testing for steel billets, South-African technology specialist H. Rohloff (Pty) Limited has developed the Billet InspectIR, an automated, high-speed system for the in-line inspection of steel billets and tubes. The advanced system fully relies on thermal imaging technology from FLIR to detect surface defects on round and square steel billets.
Established in 1946, H.Rohloff (Pty) Limited has grown to become one of the top-100 technology companies in Southern Africa. Rohloff™ is certified to ISO 9001:2008, and is synonymous with high quality, technology driven materials testing and measuring equipment, systems and solutions. Rohloff supplies and maintains a comprehensive range of quality high-tech testing and measurement products aimed at satisfying the needs of a wide range of industries. The company offers solutions ranging from portable or stand-alone thermal imaging cameras to major turnkey projects for individuals, corporations, independent wholesalers and dealers.
System requirements
The request for an automated inspection system came out of the steel industry itself. “A customer steel producer wanted something to replace the manual, visual inspection system that was in place,” comments Mr. Louie van der Walt, technical director at H. Rohloff. “The existing method was time-intensive and offered no traceability. The new solution needed to offer traceability and associated documentation for quality control purposes.”


Other requirements included that the inspection had to be fast and safe, sensitive, reliable and preferably contactless. The ability to quickly categorize billet defects according to orientation, length and depth was also important.
As a company with years of experience in thermal imaging, H. Rohloff knew that this technology was the key to success. “Through modern infrared technology we have proven that all these criteria can be met. Thermography clearly has its applications in today’s manufacturing processes, because it totally fits into the principle of Non-Destructive Testing (NDT),” comments Louie Van der Walt.
High-speed detection
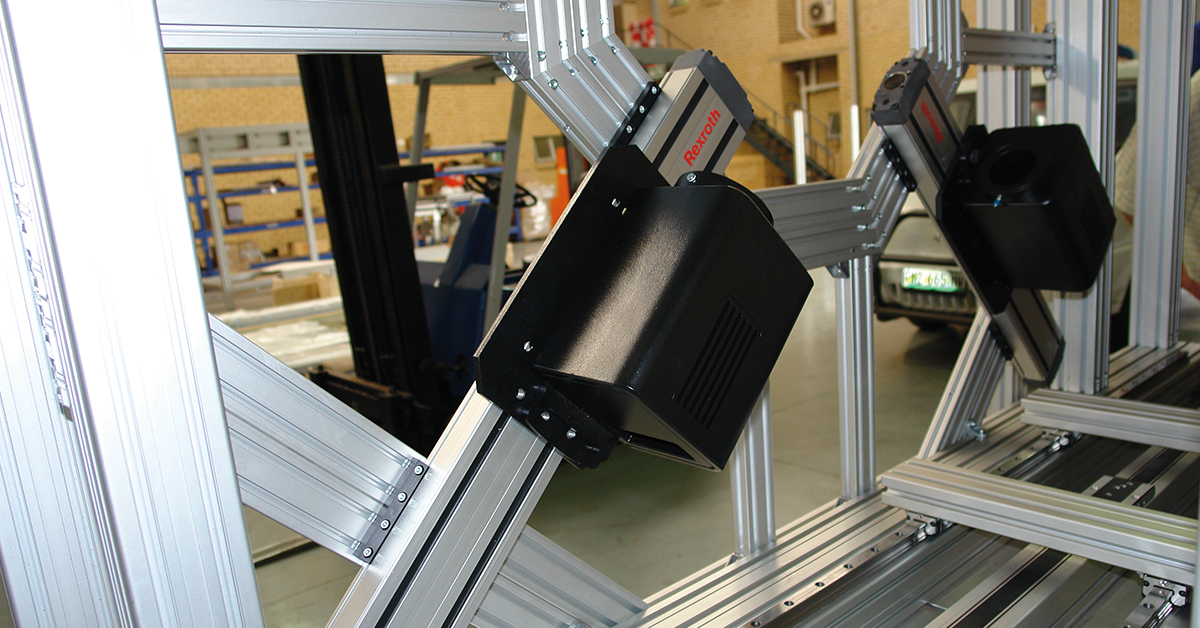
The InspectIR system comprises a thermal imaging camera enclosure, signal processing system, operating control cabinet, induction heater, induction coils, water cooling system, conveyor and defect marking equipment. Billets, bars or tubes are loaded into the conveyors and fed through the camera box. Inside the camera box, one of the three different sized induction coils heat the surface of the material to a maximum of 20°C and surface breaking defects show up as warmer than the rest of the area. Depending on the application, three or four thermal imaging cameras are placed in each of the corners of the box and capture the data generated by the warmed billet at a rate of one meter per second. This data is then analyzed by a sophisticated signal processing system which uses algorithms to identify, quantify and display the defects. The purpose designed defect recognition software was developed in conjunction with several steel manufacturers. The Billet InspectIR® has been developed to run in a fully automated inspection line, eliminating the risk of human error. A marking station then uses water-based paint to mark the position of the defect or, if need be, mark the material as a reject.

The Billet InspectIR categorizes the defects according to orientation, length and depth.
The camera box is 5 meters long, 1 meter wide and 3 meters high. It weighs 5 tons and is housed in an aluminum frame. It can automatically adjust its height according to the size of the material being inspected.

The billet InspectIR consists of a thermal imaging camera enclosure, signal processing system, operating control cabinet, induction heater, induction coils, water cooling system, conveyor and defect marking equipmen
An important principle of the InspectIR system is that the defect’s detected temperature rise is related to the depth of the surface defect. “This solution is unique – there is nothing like it on the market,” comments Mr. van der Walt. “The Billet InspectIR features traceable reporting and categorizes the defects according to orientation, length and depth. This is especially important from a materials test point of view because it allows users to determine whether to scrap the item or rework it, removing the defect. It is also contact-less which ensures that there is no wear and tear and minimal maintenance needs due to the lack of moving parts.”


Each FLIR thermal imaging camera takes a total of 76,800 temperature measurements sixty times a second. This means that 4,608,000 temperature readings are analyzed every second via four high-level signal processors. The InspectIR software automatically distinguishes between temperature variations as little as 1°C. Defects are automatically categorized according to defect depth which is directly proportional to the ΔT.
Productivity gains
“The productivity gains that result from using the billet InspectIR system are enormous,” comments Mr. van der Walt. Steel bars used to be scanned merely through visual inspection or even magnetic particle testing. Visual inspection is limited, as it is only capable of evaluating discontinuities, which can be seen on the surface of the material. It is also time-consuming and limited to the visual acuity and knowledge of the operator. Magnetic particle testing (MT) is used to locate surface and slight subsurface discontinuities or defects in ferromagnetic materials. Such flaws present in a magnetized part will cause a magnetic field, i.e. flux, to leave the part. If magnetic particles are applied to this surface, they will be held in place by the flux leakage to give a visual indication. Although an effective method, the method is also time-consuming. “Visual inspection used to take two minutes per steel bar. With the InspectIR, it can be done at a rate of six seconds per bar,” comments Mr. van der Walt.
Highly sensitive thermal imaging cameras
The billet InspectIR system has already been commissioned to several steel production companies worldwide. “Currently we have delivered one system in South Africa, one system in Germany and three systems in China,” says Mr. van der Walt. The system in South Africa and one in China uses four FLIR SC3000 thermal imaging camera units each. The other two systems for China are using FLIR’s A315 and A615 cameras.

On this thermal image taken by a FLIR A310 thermal imaging camera mounted on top of a mast shows two coal piles separated by a loading zone.

The FLIR SC-Series offer very flexible cameras, with the highest sensitivity, accuracy, spatial resolution and speed. "The FLIR cameras help us provide a stringent quality control, which is absolutely necessary because these bars are cut into small sections later in the process and used for safety-critical components in automotive vehicles," comments Mr. van der Walt.
“We especially valued the camera’s high sensitivity and speed, because our billet InspectIR system needs to be able to monitor raw steel bars at a speed of one meter per second.”
Also the FLIR A-Series offers highly sensitive camera models that feature a high speed infrared windowing function. The FLIR A-Series allows you to record thermal images at high frame rates (e.g. 200 Hz for the A615).

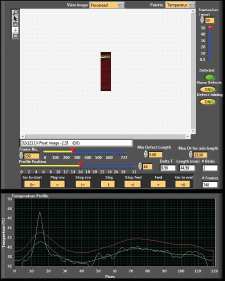
The thermal images clearly show any defects in the billet
“Next to their high sensitivity, FLIR cameras are also easy to integrate into larger systems like the billet InspectIR, because the cameras have a relatively compact and lightweight design,” Mr. van der Walt comments.
Another highly valued feature is the fact that FLIR offers H. Rohloff the appropriate tools for camera control. “Every time a different bar size is loaded into the billet InspectIR, the focus of the thermal imaging cameras needs to be adapted. Thanks to dedicated FLIR software, a previously used focus position can be saved into the memory and recalled when needed. This also
allows the inspection to be performed faster and more efficiently.”
Extensive reporting capabilities
All thermal images are displayed on the test screen. After each raw steel billet or bar has passed through the system, a thermal image and report of the test part is generated. All results are stored and can be downloaded or printed at any stage. Defect data such as position, depth, length, orientation as well as the categorization is stored in the database. A laser speed measurement gauge is used to accurately control the defect marking